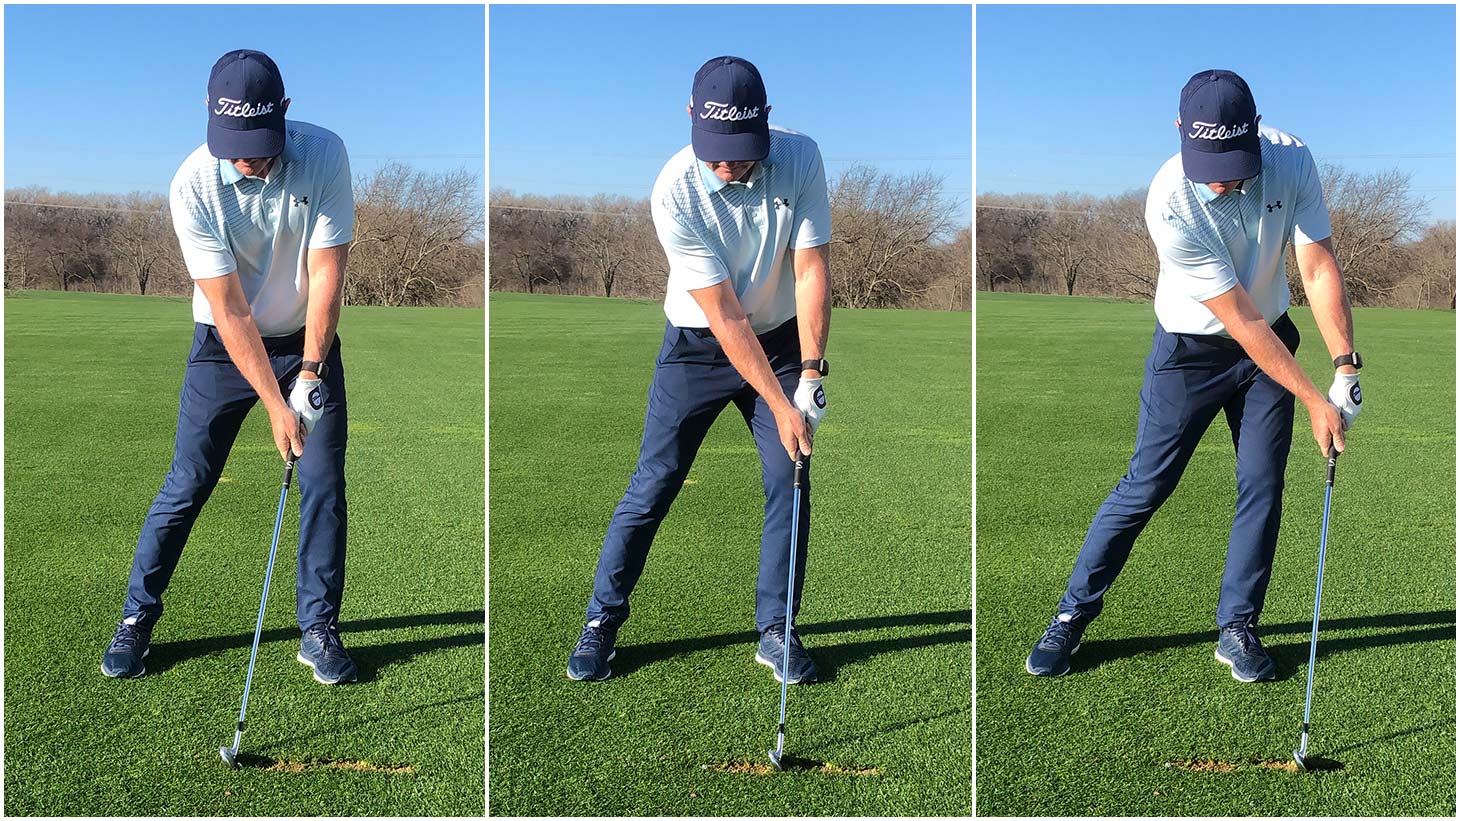
 Titleist staff member Cameron McCormick
Skills Over Style
I started to coach the way I learned to play the game, which was very methodical and very mechanical. I wasn't very good as a coach very early on because I prioritized form over function. And I began to understand that my teaching philosophy needed to essentially be the reverse of that, that skills are far more important than style. Developing skill is the key to consistency.
There are two primary skills you need in order to make the golf ball behave the way you wish. The most important, The King, is contact control - where on the face of the club you make contact with the golf ball. The second, The Queen, is face control, how the face is oriented at impact (but we’ll save that subject for a separate article.) — Cameron
•••
Your Current Contact Pattern
To improve contact control, you must first determine your current strike pattern. Do you find the center of the face on a very regular basis? Or do you make contact with the golf ball all over the face? Or maybe your contact has a bias or a tendency - predominantly towards the toe, heel, high or low on the face?
There are many means to take yourself through a very simple assessment. It doesn't matter whether you use a driver, lob wedge or a six iron. I like to use six golf balls and I mark the back edge of each ball with a dry erase marker. You can also use face tape, if you prefer, or you can spray foot spray on the face of your club. Hit each ball and a visible imprint pattern will be left on the club face.
Regardless of your results, improving your contact ability starts with your becoming aware of your current tendencies and then practicing intelligently to achieve center contact. To do this, I’d like to share a couple of drills that will enhance your coordinative skills, just like we would if we were catching a ball or throwing a ball or jumping or running.
There's coordination that we all possess, and that's not fixed with absolute certainty. The reason I know this is that I’ve used these same drills with countless high handicappers and seen almost immediate improvement. And in a matter of three to five minutes, you yourself can improve your coordination to hit the center of the clubface.
STEP ONE:
Assess your Strike Pattern (above)
STEP TWO:
Add the Low Point Laneway Drill to your practice routine (applies to everyone!)
STEP THREE:
Based on your strike pattern, work on the appropriate Jump The Fence Drill:
Heel Contact - Click here
Toe Contact - Click here
Fat Shots (striking the ground behind the golf ball) - Click here
•••
Low Point Laneway: The High Mileage Drill for All Golfers
Set up a laneway using three tees as seen in the photo above. The middle tee is your target, what you’ll be trying to strike. The other tees serve as barriers, forming a gate or laneway through which you will attempt to swing. Make sure to push the tee closest to you almost all the way down into the ground so that it does not catch the hosel of the club. The width of the outer tees will vary based on your skill level. Start off with about half an inch of space between the outer tees and the toe and heel of your club.
- Through a series of small practice swings and starting very slowly, develop an awareness of bringing the club down through the laneway, such that when you do it successfully, you are only going to move ground right in between the two outer tees. Only the middle tee is struck.
- Eventually blend that into half speed, 3/4 speed and then full speed practice swings. Again, the club should pass cleanly between the two outer tees. If you do happen to nick an outer tee, take a step back and work smaller and slower again.
- Once you can make a series of full practice swings that pass cleanly through the laneway, progress to full swings with a golf ball. Tee balls up on the middle tee and hit several shots at full speed. Done successfully, contact should be right in the center of the clubface.
And if your face contact is not centered, what should you do? Wash, rinse and repeat. Don't spit the bit and go to some other swing feeling. Do your best and let the skill develop over time. All I'm asking is three to five minutes each time you practice.
Low point laneway is the most high-mileage play that I can share with you to enhance centeredness of contact. However, if you continue to struggle with contact, I have a higher strength prescription to address your specific miss tendency:
•••
Jump The Fence: Correcting Heel-Biased Contact

If you continue to see contact toward the heel of the club (or even occasional contact with the hosel), we can safely say that the clubhead is moving out, farther away from you than it was at address. This could happen due to your mass shifting or it could be over-extension, or it could be some funky swing plan at the bottom of the swing arc. Regardless of the reason why, the cure is Jump the Fence.
Lay an alignment stick down or tee up a series of golf tees in a straight line to form a fence (you can also scrape a line in the turf using a golf tee).
- Set up naturally with your clubhead soled on the far of the fence. Make a small practice swing and focus on landing the club on the inside of the fence.
- Make a series of swings, again, starting slow and gradually building speed until you’re able to start beyond the fence and land inside the fence.
- If you do happen to nick the fence, take a step back and work smaller and slower again.
- Once you can make a series of successful full practice swings, progress to full swings with a golf ball. Tee balls up on the inside of the fence. Sole your club on the far side of the fence and hit several shots at full speed. Done successfully, contact should be right in the center of the clubface.
What we're trying to do is to teach our brain and our body to coordinate together. Rather than reach away from us, overextend, or for our body to thrust forward, we’re forcing our brain to organize and make room - to bring our arms close and make sure our body stays back. And to strike the center of the face.
How long should you do the drill? You do it as long as necessary to where you can be successful with it. If I'm in a coaching session, I might scale or slightly modify the challenge. I might start with the practice attempts from the far side of the fence to inside the fence. And then when I'm asking the player to actually hit a live-fire rep with an actual golf ball, I'll have them start with the club just hovering right over the top of the fence (straddling it, if you will) and then have them strike a tee or a golf ball. So, I'm slightly modifying, I'm making it a little bit achievable, because the last thing I want is for you to do the drill and still shank it. You’re just looking for enough exaggeration to reverse the movement of the club away from you as it passes through the ball.
But sure enough, if done in this manner for five minutes, the next time you address a golf ball normally, the chances of you actually hitting it out of the heel are greatly diminished. In fact, I'd bet a significant amount of money that contact is going to be center or even way far out in the toe. Because if you address it center and you land it on the heel, that's a movement of maybe an inch. What I'm asking you to do is to learn to move the club from the far side of the fence to the near side, and that's a distance of at least four if not four and a half inches.
•••
Jump The Fence: Correcting Toe-Biased Contact

If you have a toe contact problem, which is probably the most common contact problem, you’re starting with arms extended. But for some reason, coming down into impact, your arms are at something less than the same level of extension. And therefore, your radius is narrower. You lift the club some margin off the ground, some margin closer, and the result is toe contact.
Toe contact is really debilitating because shots just drop weakly out of the air. With toe hits you’ll likely feel the club spinning in your hands, too. You'll feel like this was something you did. But in reality, it's not you torqueing the club that way, it's just the added leverage created by an impact that is relatively far from the golf shaft.
Can you guess what we do to correct it? Yes, the opposite of the heel contact setup. We set up with club soled inside the fence and jump over the fence with super reach.
Lay an alignment stick down or tee up a series of golf tees in a straight line to form a fence (you can also scrape a line in the turf using a golf tee).
- Set up naturally with your clubhead soled on the near of the fence. Make a small practice swing and focus on landing the club on the far side of the fence.
- Make a series of swings, again, starting slow and gradually building speed until you’re able to start inside the fence and land beyond the fence.
- If you do happen to nick the fence, take a step back and work smaller and slower again.
- Once you can make a series of successful full practice swings, progress to full swings with a golf ball. Tee balls up on the outside of the fence. Sole your club on the near side of the fence and hit several shots at full speed. Done successfully, contact should be right in the center of the clubface.
Thin contact is close cousin to toe contact, so if you make contact on the bottom-most grooves or if you can’t take a divot, follow this same Jump the Fence prescription.
•••
Jump The Fence: Correcting Fat-Biased Ground Contact

Now, there's one last contact area I’d like to cover, and that's fat contact. I think of ground contact like an airplane landing. The pilot is on the approach, in descent, and bad things happen when the plane hits the ground before it actually gets to the runway, right? Same in golf. The runway begins at the very back edge of the ball, and so we as players need to be super good at developing an awareness for the beginning of that landing strip. And if I make a mistake, I need to land deeper into the runway.
How do we build this skill? We jump the fence in a forward direction.
- Set up your fence perpendicular to your target line as seen in the photo above.
- Get into your golf posture and sole the club right against the east edge, the right side of the fence (for a right-handed golfer).
- Wind up really slowly and deliberately. In order to hit the ground to the left, over the fence and closer to my west side versus my east side, I need to shift west and I need to get the handle of my golf club leading the clubhead.
- Make a series of swings - again, starting slow and gradually building speed until you’re able to consistently start behind the fence and land the club over the fence and down the runway.
- One important note: I never hit shots with this version of the Jump the Fence drill. This bears repeating. I never hit shots jumping the fence trying to solve for fat contact!
But here's what we can do. We graduate from experiencing what it's like to miss something really far on the forward side. We overemphasize to find the optimum to this drill. It's called Linked Divots. It's a progressive exercise to develop landing control that moves further to the left, one swing then two swings then three swings.
•••
Linked Divots: Advanced Correction for Fat-Biased Ground Contact
/teamtitleist/cfs-file/__key/telligent-evolution-components-attachments/13-1136-00-00-00-12-21-72/001-Cam-McCormick-Linked-Divots-2-1460x821.jpg/teamtitleist/cfs-file/__key/telligent-evolution-components-attachments/13-1136-00-00-00-12-21-73/002-Cam-McCormick-Linked-Divots-1-1460x821.jpg
 In the Linked Divots Drill, the goal is to create three divots in a row...1/2
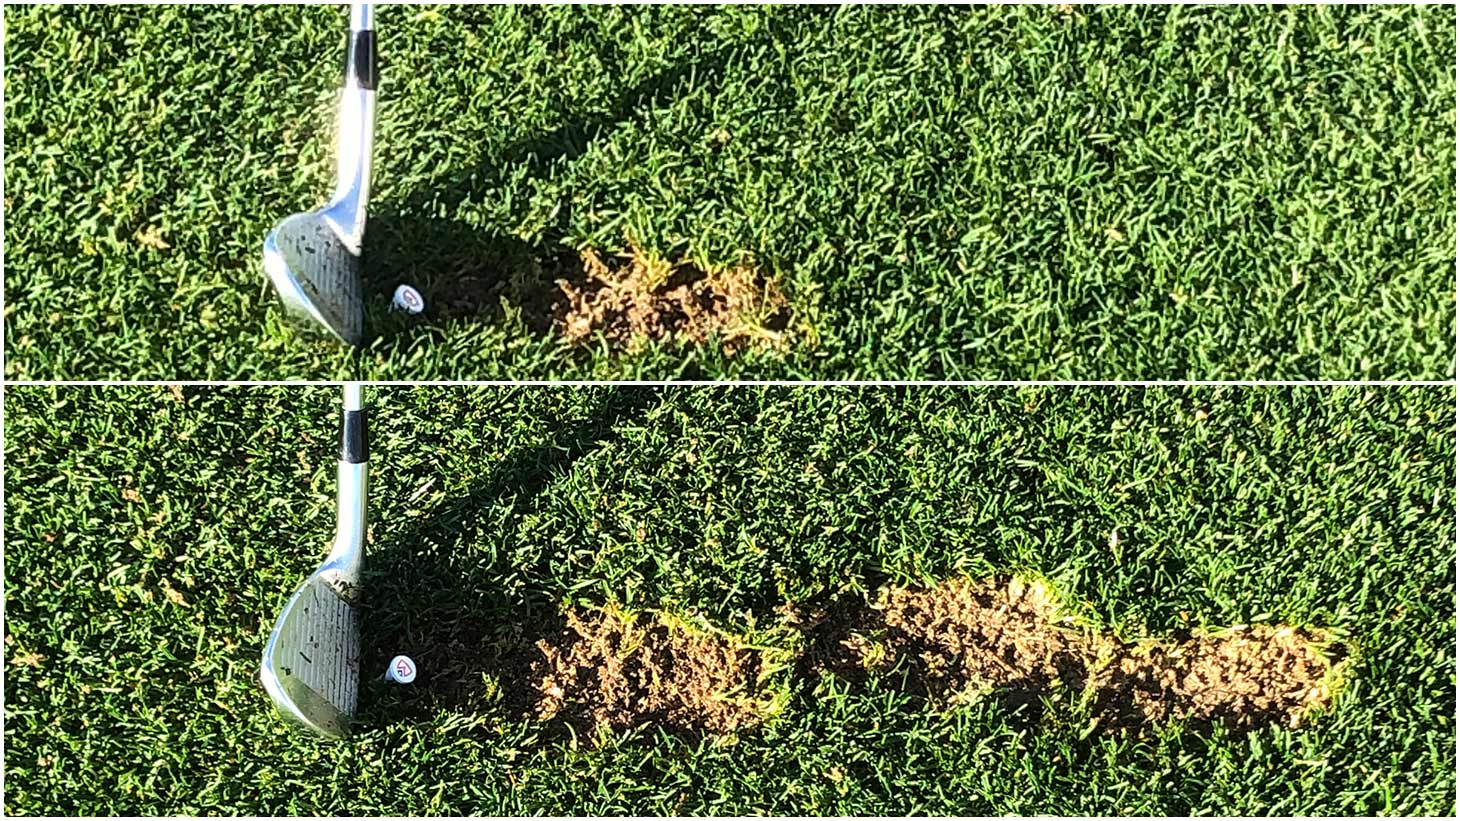 ...each divot closer to your target than the one that preceded it.2/2
- Put a tee in the ground. Your first attempt is to land the club on the tee. That's divot one.
- Don’t move your body. For Swing No. 2, the far edge of Divot No. 1 is now the beginning of your new runway. Try to land your club there and take a second divot beyond the first.
- For swing No.3, the far edge of Divot No. 2 is now the beginning of Runway No. 3. You may have difficulty taking a divot on this swing, but you should be able to at least brush the blades of grass at the far side of Divot No. 2.
I can tell you with surety, with certainty - do this drill three to five minutes in between attempts at striking the ball, and if you start with an error of landing the plane short of the runway, almost always the next shot is absolutely flush. And if it's not, you've landed the club too far to the left.
That sums up the King of all skills. Your surest path to consistent ball striking is enhancing your ability to find centers of contact. Not toe, not heel and not the big ball first. Not moving a bunch of earth before the golf ball.
Good luck!
•••
Thanks very much for sharing these terrific insights, Cam!
To bring your game from good to great, and from great to world-class, check out the instructional programs Cameron has to offer at Altus Performance.
And for more great content, make sure to subscribe to Cameron's Earn Your Edge podcast, and visit him on Instagram, Twitter and YouTube, too!
Team Titleist
Add these drills to your practice regimen and check back with us. We want to know how your contact and ball striking improve once you start focusing on your skills vs. your technique.